Create a New Form Overview
About AssetTrack Forms
AssetTrack allows you define forms for creating or updating asset records. For example, you can create an Inventory form to add assets to the database, a Receive form to receive new assets at the receiving dock and a Move form to assign assets to users and locations. AssetTrack forms can be customized by adding and removing fields to meet your specific needs, and you can create as many forms as you would like.
There are three ways to access AssetTrack forms:
- Using AssetTrack Mobile software running on a Motorola or Intermec Windows Mobile device with an integrated barcode scanner.
- Using Pocket Internet Explorer from a Windows Mobile 5/6 device connected to the network.
- Using desktop Internet Explorer 6 or later.
Accessing the List of Forms
AssetTrack supports mobile and web forms for collecting data. AssetTrack comes out of the box with a default set of forms for common asset tracking tasks. These forms can be modified and new forms can be created using the Management Console.
To access the forms configured on your AssetTrack Server:
- Open The Management Console
- Expand the Forms node in the Server Navigator. Then expand the Mobile node to see the list of mobile forms or expand the Web nodes to see the list of web forms.

- Double click a form in the Server Navigator to open it for editing.
Creating a Form Overview
Creating a New Mobile Form
To create a new mobile form:
- Right click on the Mobile node and click Create New Mobile Form from the context menu.

- The new mobile form will open in the console for you to set the new form properties.
Creating a New Web Form
To create a new web form:
- Right click on the Web node and click Create New Web Form from the context menu.

- The new web form will open in the console for you to set the new form properties
Using the Form Designer
When you create a new form or open an existing one, the form is opened in the Form Designer.
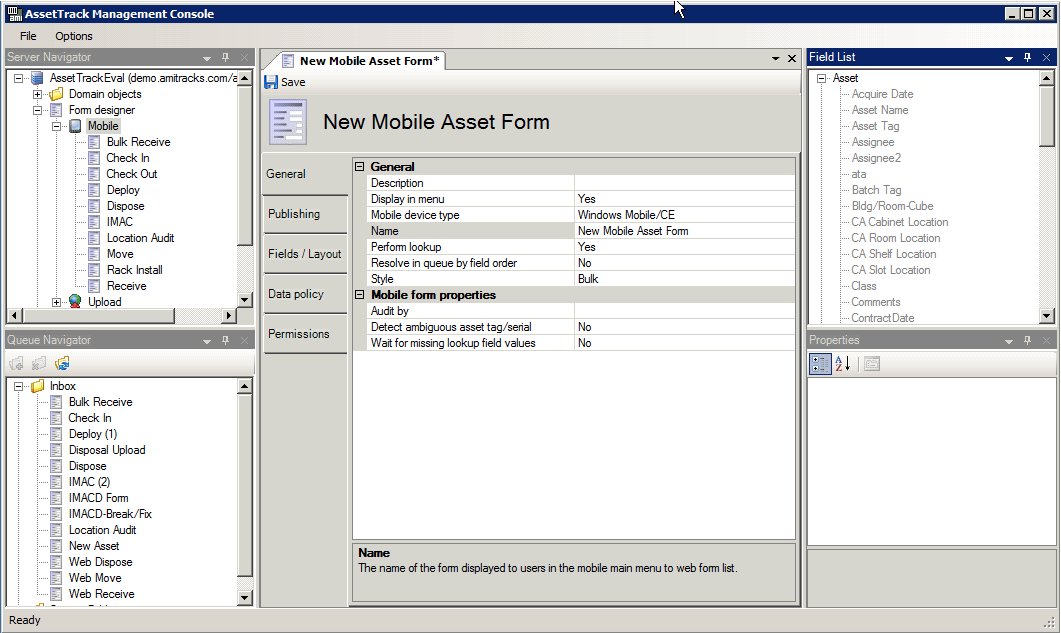
The Form Designer is used to set the various properties of forms, which are broken down into four tabs:
| Property Tab | Description |
|---|---|
| General | The General tab includes properties for the form including the name, description, type (bulk/single), and helper text to be displayed on the screen to users of the form. See General Settings for more information. |
| Publishing | The Publishing tab allows you to attach "Handlers" to this form, which govern what systems are updated when records collected with this for are published. See Attaching Handlers for more information. |
| Fields / Layout | The Fields / Layout tab allows you to specify the files on the form, their position as well as field properties like label, default value and other field settings. See Fields & Layout for more information. |
| Data Policy | The Data Policy tab allows you to specify the rules and scrubbers for the form such as what fields are required, the format of data in certain fields, valid date ranges, etc. Rules can be configured to run on the mobile device or web form, in the queue during reconciliation, or during publishing. See Setting Data Policies for more information. |
| Permissions | The Permissions tab allows you to set who has access to the form and what kind of rights they have to the form. See Configuring Permissions for more information . |
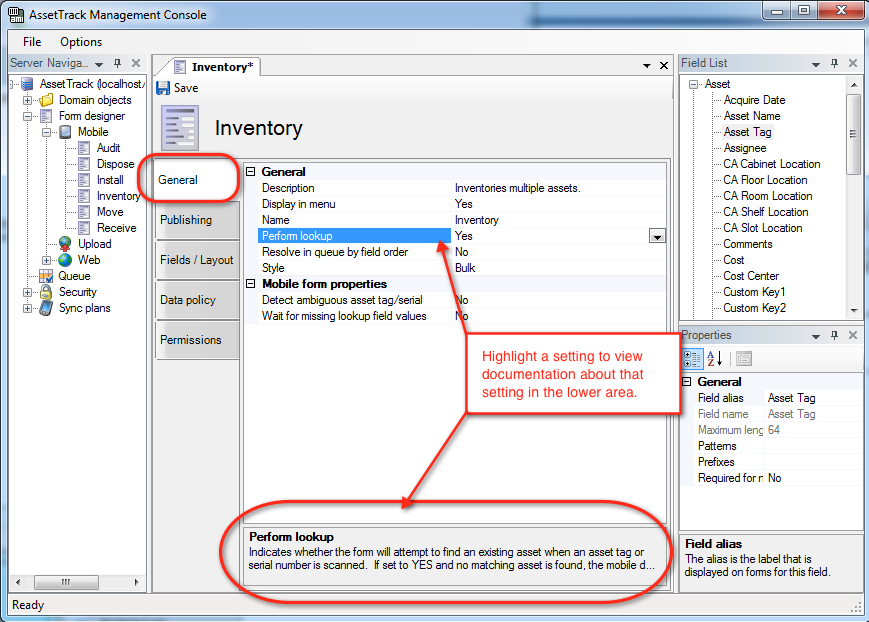
General form settings
This area exposes settings that are general to a given form.
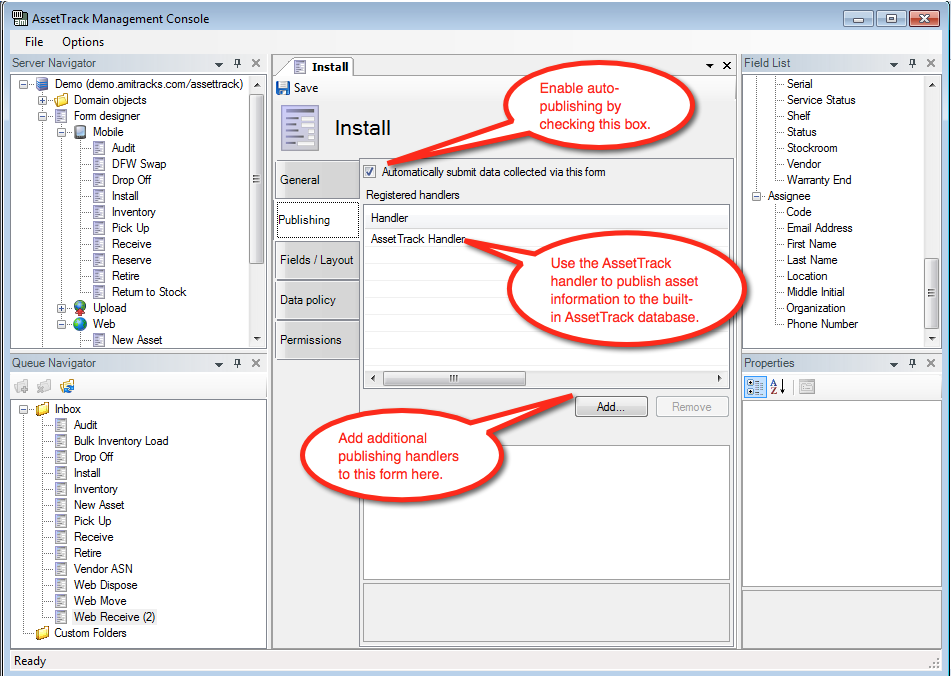
Publishing settings
The Publishing tab defines to where data should be sent once records are published from the queue. To publish asset data to the internal AssetTrack database, attach the AssetTrack handler to this form. Use other handlers to send data to other systems. You can also enable "auto publishing" by checking the Automatically submit data collected via this form check box. Doing so means that AssetTrack will immediately attempt to publish records as soon as they are uploaded. Any record that violate rules specified on the Data Policy tab will remain in the queue.
Fields and Layout settings
The fields and layout tab is where you design the layout of your forms. By dragging fields from the Field List at the upper right corner into the middle section, you're defining how the forms will look to the end user. The property grid at bottom right allows you to configure each field.
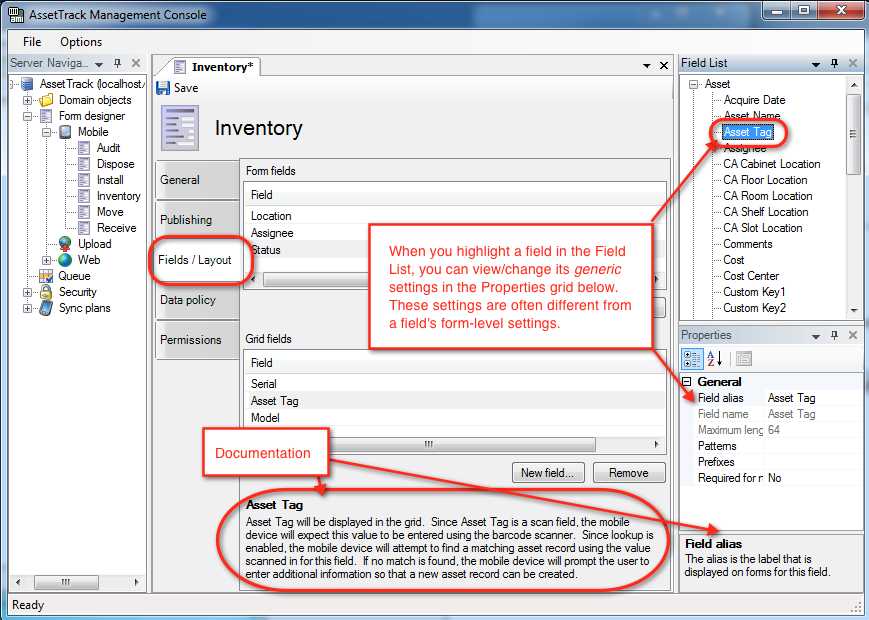
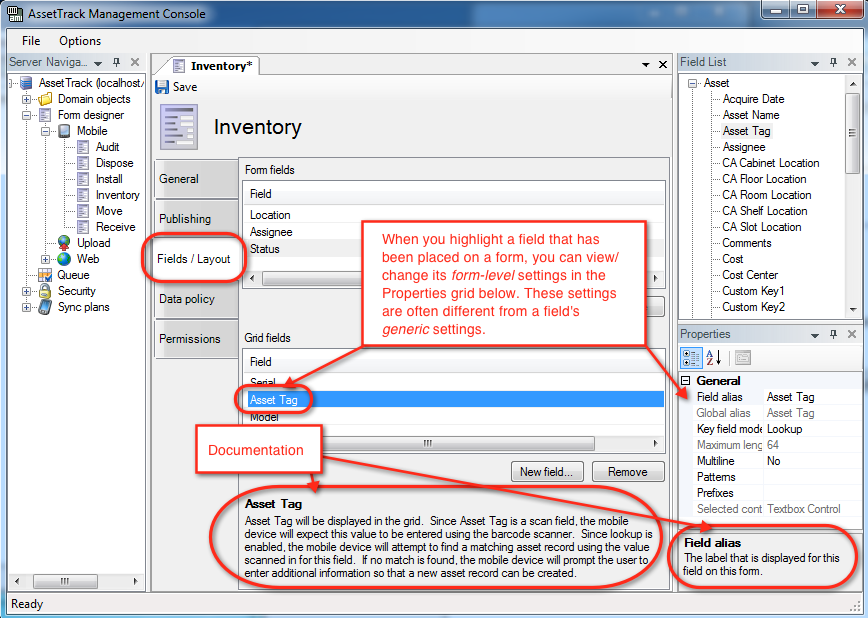
Changes to generic field settings won't be seen by forms. When you drag a field from the Field List onto a form, you're creating a form-level field that is an independent copy of the generic field in Field List. The new form-level field is independent of its generic counterpart in the Field List, and changes you make to one will not affect the other.
Data Policy (aka Validation)
For each task form you can configure business rules to enforce that must be followed by data collectors and queue processors. This ensures that field users collect all required data, collect data that conforms to your patterns, and specifies whether field users can or can't create referential data like models, location or assignees, as needed. This ensures that data submitted to AssetTrack is complete so that exceptions are minimized.
Enforcing Rules on the Form vs. the Queue vs. at Publish Time
Each data policy rule can be configured to run on a Task form as data is collected, in the Queue as data is scrubbed, or as records are published to the database. There are different reasons why you may want to enforce rules in different locations. For example, you may want to allow data collectors to create new models as they recieve assets or perform wall-to-wall inventories. However, you may want records with new models to be trapped in the Queue for review by your asset manager. In this case, you would create a rule that detects new models, but only run it in the Queue. You don't want your field users blocked by this rule, but also don't want new model data to stream into the database without being checked out first.
Rule Levels
When you attach a rule to a field on a form, you must also specify whether the rule should be applied as an Error, Warning or Message. This setting determines what the user sees when collecting data or when editing the data in the Console.
Severity | Icon | Results |
|---|---|---|
| Error |  | This is a critical rule. Records cannot be collected nor published if this rule is violated. You must fix the offending value before saving or publishing this record. |
| Warning |  | This value may cause problems at publishing or reporting, but you may save or attempt to publish the record anyway. |
| Message |  | This is an informational message only to call out certain things about the value you collected. It does not mean there is a problem with the data, but you may want to take a look. |
Popular Validation Rules
Commonly used rules you can add to your forms is shown below.
Name | For Field Types | Description |
|---|---|---|
| Not Empty | All | This is your "required" validator, ensuring a field has data in it. |
| String Pattern | Text | Ensures the value provided in a field matches a regular expression you provide. This is our most powerful validator, as it can ensure data meets very specific formats. |
| Detect New Value | Object (location, model, assignee) | Detects if the data collector created a new record in a reference field. For example, when this rule is added to the model field, this rule fires when a data |
Saving Forms
To save changes on the server, press the Save button. Your form changes will be uploaded to the server. Changes will be available immediately to web form users. Mobile users will have to re-sync their devices in order to see form changes.

Deleting Forms
To delete a form, right click on it in the Server Navigator, and then select Delete.

Copyright Asset Management International, LLC 2003-2009, All Rights Reserved