Installing AssetTrack Server
Before you can install the AssetTrack Server, you need to have done the following:
- Created the AssetTrack database. See Installing the AssetTrack database for more information.
- Verified your server meets the minimum requirements for an AssetTrack Server. Requirements are covered under Application, API, and database server requirements.
- Prepared your server for the install. See Preparing your IIS Server.
On this page:
To install AssetTrack Server
Your AMI sales representative should have sent you an email containing a link to the AssetTrack Installer, which is an executable file named AssetTrackSetup.exe. Please submit a request through the AMI Support Help Desk if you did not receive it.
AssetTrackSetup.exe must be run on the IIS machine
Note that AssetTrack Server cannot be installed by running AssetTrackSetup.exe on a remote machine. AssetTrackSetup.exe must be running on the IIS machine.
- Download the AssetTrackSetup.exe on to the server and run it.
The End User License Agreement screen appears.
- Read the terms and check the "I agree to the terms of the license agreement" box if you accept the terms.
- Click Next to continue.
An informational message is displayed "AssetTrack setup is checking your system for required components. Please wait..."
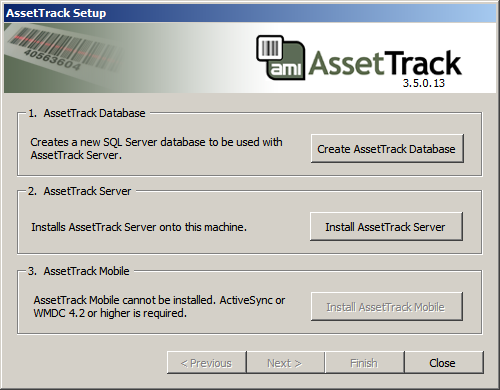
If no problems are found, a screen with AssetTrack install components is displayed.
- Click Install AssetTrack Server from the main menu.
The AssetTrack Server database settings dialog appears.
Enter the desired database settings:
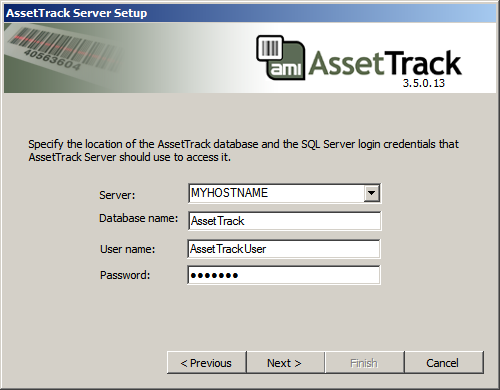
Setting Description Database Server Where MYHOSTNAME is the name of the database server that hosts the AssetTrack Database to which the web application should connect. The name of the database server you entered during the database setup will be the default. Database Name The name of the AssetTrack Database to which the web application should connect. The name of the database you created during the database setup will be the default. Username and Password These are the SQL Server login credentials that you want AssetTrack Server to use on a day-to-day basis. They should have been created during the AssetTrack database setup process. During this phase of setup, AssetTrack will validate these credentials. Click Next.
The server install dialog appears.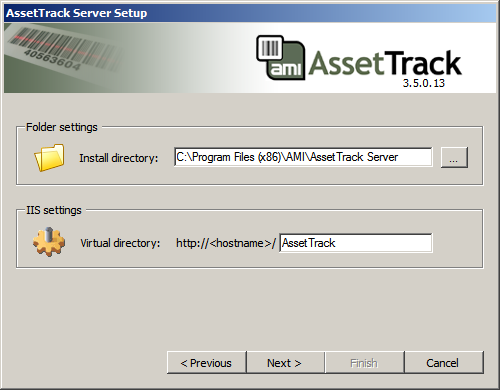
Enter the install and virtual directories where:
Setting Description Install Directory The directory where AssetTrack will be installed on the server.
Note the differences between the 64 bit and 32 bit operating systems:
64 bit operating system: C:\Program Files (x86)\AMI\Asset Track Server
32 bit operating system: C:\Program Files\AMI\Asset Track Server
Virtual Directory The name of the IIS Virtual Directory where you would like AssetTrack Server installed. It is recommended that you leave the default value of AssetTrack. Click Next.
The security settings dialog appears.
Select the security option based on the following descriptions:Option Description AssetTrack security This is the default security setting. AssetTrack security allows you to control access to AssetTrack using AssetTrack's security model. Every user will be required to have their own AssetTrack username and password and they will be required to log in every time they access the server.
Use this setting if you do not have a Windows domain or you do not want AssetTrack users to be tied to Windows users.
Windows security Use Windows security if you want to associate AssetTrack users with users in an Active Directory domain. AssetTrack users will still need to be created, but once associated with a Windows user, users can use their domain credentials to access the server and the mobile. In addition, if these users are logged into their machines using their domain credentials, they will not have to log in separately to AssetTrack Server or the Management Console. - Click Next.
A progress meter will appear.
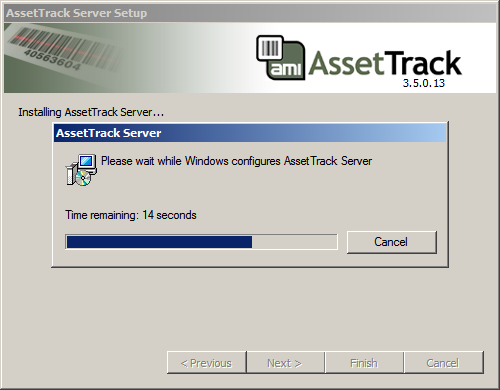
If the install was successful, AssetTrack displays an AssetTrack Server was installed successfully message.
- Click Finish to return to the main menu.
Further IIS configuration
If you are installing AssetTrack version 3.2 or earlier, you will need to do some additional configuration of IIS. For information see Configuring IIS for early versions of AssetTrack.
Troubleshooting common issues
If you encounter installation or configuration problems, please refer to the Installation and configuration issues page for possible solutions.
You are now ready to perform some initial configuration.
Related Topics