Installing the AssetTrack database
In this section, you'll be creating a new SQL Server database for AssetTrack.
There are two options for creating a new SQL Server database. One option is creating the AssetTrack database as an administrator. The second option is used when you install AssetTrack using an SQL database that has been created for you by your database administrator (DBA). This second option is provided because large enterprises often restrict the creation of databases to DBAs.
On this page:
Download the AssetTrack Installer (AssetTrackSetup.exe)
Your AMI sales representative should have provided you with an email message that contains a link to an AssetTrack installer, named AssetTrackSetup.exe. Download this file onto the server, or servers, where you will be performing the install. Please submit a request through the AMI Support Help Desk if you have not received a link to the install file.
The AssetTrack database can be installed from a remote machine
To create the AssetTrack database, AssetTrackSetup.exe can be run from any machine that has TCP/IP access to the SQL Server machine. In multi server configurations, it's often run from the IIS server because it's convenient to do so.
Option 1: Creating the AssetTrack Database as a SQL Server administrator
- Before proceeding, ensure the following:
- You have configured your SQL Server for Mixed Mode authentication and enabled remote connections as described in the Preparing your SQL Server.
- You have sufficient rights to create a new database, login, and user on the SQL Server. Typically this means that you have administrator rights on the SQL Server.
Run the AssetTrackSetup.exe.
The End User License Agreement screen appears.- Read the terms and check the "I agree to the terms of the license agreement" box if you accept the terms.
- Click Next to continue.
An informational message is displayed "AssetTrack setup is checking your system for required components. Please wait..."
If no problems are found, a screen with AssetTrack install components is displayed. - Click Create AssetTrack Database from the main menu.
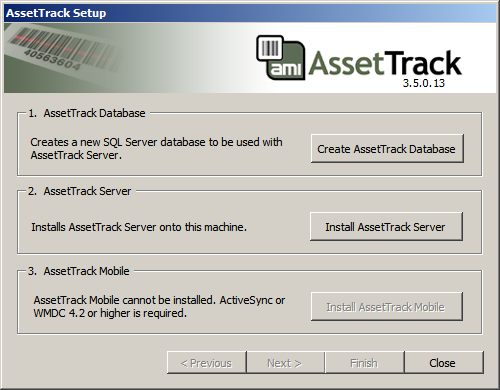
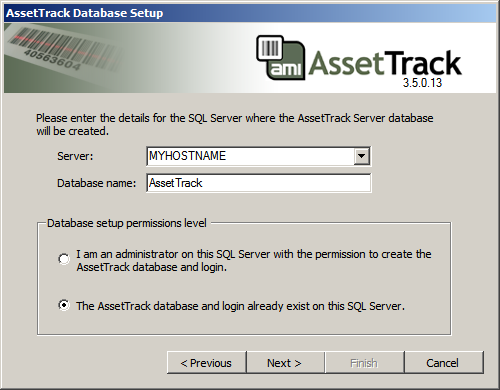
The database setup permissions level screen is displayed. Enter the desired database settings. See the table below for details.

Setting Description Server Where MYHOSTNAME is the name of the SQL Server computer where the AssetTrack database should be created. If Windows SQL Server, version 2005 or greater, is installed on the local machine, the machine name will appear automatically in the Server combo box. If you wish to create an AssetTrack database on another server, select that server from the drop-down list, or enter the server name manually. Database Name The name of the database that you wish to be created. It is recommended that you leave the default value of AssetTrack. Database setup permissions level The level of access or permissions that the SQL Server account you are using to create the database has. Since you are using an account that has the required permissions, select the first option, I am an administrator on this SQL Server with the permission to create the AssetTrack database and login. - Click Next to continue.
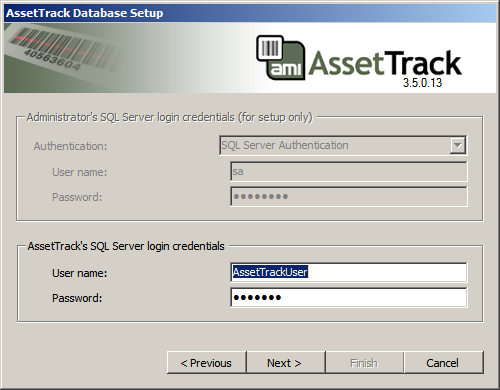
The login credentials screen is displayed.
Enter the database credential settings. The table below provides details about each setting.
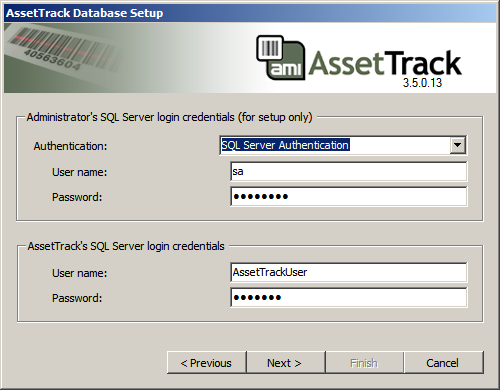
Setting Description Administrator's SQL Server login credentials This is where you specify your SQL Server administrator credentials. These credentials will be used at setup time only to create databases and SQL Server logins, so they must have sa or sa-like power for this SQL Server instance. This is not the account that AssetTrack will use to do day-to-day work.
- If you select SQL Server authentication, we recommend using the sa user or someone in a similarly elevated group.
- If you select Windows Authentication, then you should use a user that is a member of a powerful group like Administrators.
AssetTrack's SQL Server login credentials These are the SQL Server credentials of the limited account that AssetTrack will use to do its day-to-day work. If this account does not exist when you run this installation step, it will be created. Click Next to continue.
The AssetTracker Database Setup program begins to create the database on the server.
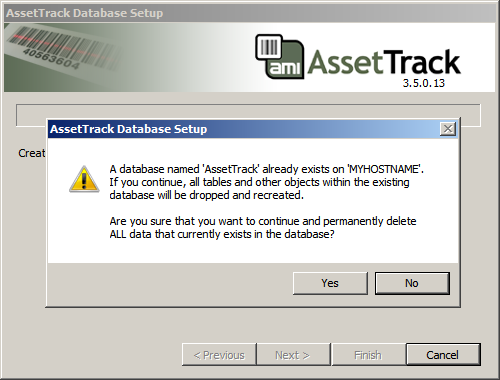
If the AssetTrack database already exists, you will receive a warning that your database will be overwritten if you proceed.
If you press YES, your existing AssetTrack database will be overwritten permanently.
Press NO to return to the login credentials screen to enter new database information.
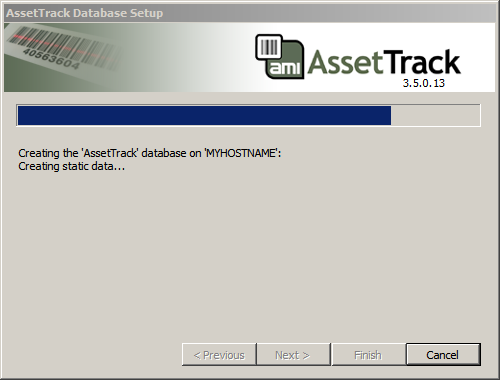
If there are no warnings, the AssetTracker Database Setup program will now create the database on the server.
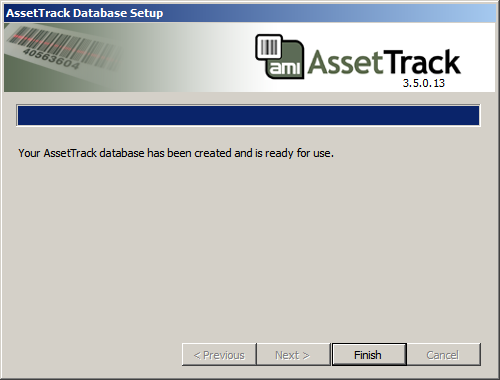
When the database setup completes successfully, the install displays the "Your AssetTrack database has been created and is ready for use" informational message.- Click Finish to return to the main menu.
Option 2: Working with a database administrator (DBA) to set up the AssetTrack database
Sometimes, particularly in production environments, company security policies require you to work with a database administrator (DBA) to get your AssetTrack database created. In such cases, you will need to ask the DBA to create the AssetTrack database and login for you.
- Before proceeding, ensure your database administrator has done the following:
- Configured the SQL Server for Mixed Mode authentication and enabled remote connections as described in Preparing your SQL Server.
- Created an empty AssetTrack database and login for AssetTrack to use:
- Create a new empty SQL Server database for AssetTrack.
- Create a new SQL Server login for AssetTrack to use: in the "New Login" dialog, use the User Mappings tab to map the new login to the AssetTrack database, the new login should be added to the "db_owner" role for the AssetTrack database.
- Given you the name and credentials to access the AssetTrack database
- Run the AssetTrackSetup.exe.
The End User License Agreement screen appears. - Read the terms and check the "I agree to the terms of the license agreement" box if you accept the terms.
- Click Next to continue.
An informational message is displayed "AssetTrack setup is checking your system for required components. Please wait..."
If no problems are found, a screen with AssetTrack install components is displayed. - Click Create AssetTrack Database from the main menu.
The database setup permissions level screen is displayed.
Enter the desired database settings. See the table below for details.
Setting Description Server The name of the SQL Server computer where the AssetTrack database should be created. If the SQL server installed on the local machine, is Windows Server 2005 or greater, the machine name will appear automatically in the Server combo box. If you wish to create an AssetTrack database on another server, select that server from the drop-down list, or enter the server name manually. Database Name The name of the AssetTrack database that has been given to you by your database administrator. Database setup permissions level The level of access or permissions that the SQL server account you are using to install the database. Since you are using a non administrator account, select the second option, The AssetTrack database and login already exist on this SQL Server. Click Next to continue.
The login credentials screen is displayed.
Enter the database credential settings.
Setting Description AssetTrack's SQL Server login credentials The credentials AssetTrack should use to connect to the target SQL server. These values should have been provided to you by your database administrator.
When finished click Next to continue.
The AssetTracker Database Setup program begins to create AssetTrack metadata for the database on the server.
Because the AssetTrack database already exists, you will receive a warning that your database will be overwritten if you proceed.
Click Yes if this is the initial build of the database.
If this is NOT an initial build of the database, and you click YES, your existing AssetTrack database will be overwritten permanently. In this case click No to return to the login credentials screen to enter new database information.
If there are no warnings, the AssetTracker Database Setup program will now start building the database on the server.
When the database setup completes successfully, the install displays the "Your AssetTrack database has been created and is ready for use" informational message.
Click Finish to return to the main menu.