Preparing your SQL Server
Prior to creating the AssetTrack database, you'll need to configure the SQL Server authentication mode and enable remote connections to the SQL Server.
On this page:
Configuring authentication mode
During the SQL Server installation
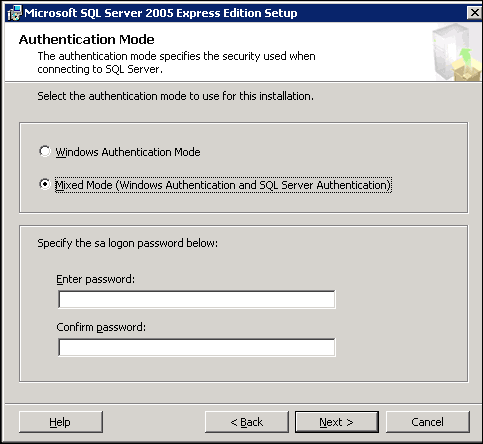
If you have yet to install your SQL Server, there will be a point during the installation where you can choose the authentication mode. The screen shot below shows the Authentication Mode dialog box.
At this point in the install select Mixed Mode and specify a password for SQL Server's "sa" account.
Verify or change authentication mode after SQL Server installation
If you have already installed your SQL Server here is how you can verify this setting, or change it if need be:
- Connect to your SQL Server using SQL Server Management Studio by clicking Start -> All Programs -> Microsoft SQL Server 2008 (or 2008 R2) -> SQL Server Management Studio.
The Connect to Server screen is displayed.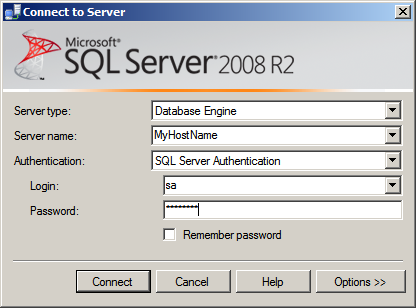
- Enter the information for the server and authentication:
Server type: Database Engine
Server name: Substitute YOUR SERVER NAME for MyHostName
Authentication: SQL Server Authentication
Login: Your SQL Server's "sa" account's login.
Password: your SQL Server's password - Click Connect.
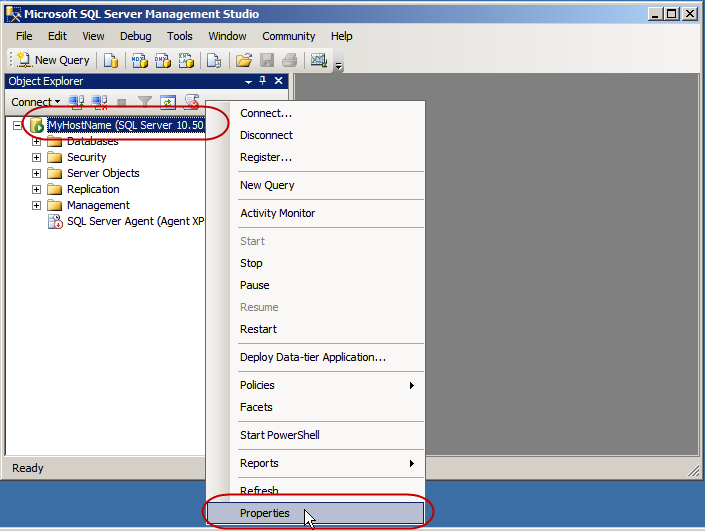
The Microsoft SQL Server Management Studio window is displayed. - Right click on the Server name and select Properties.
The Server Properties window is displayed.
- Click Security and select the SQL Server and Windows Authentication mode, if it is not already selected.
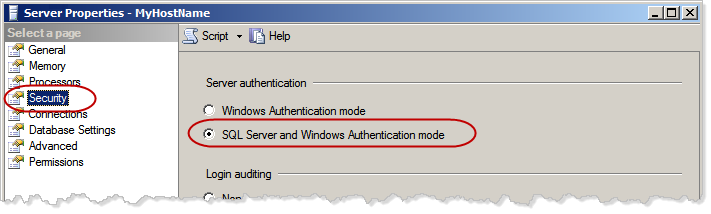
- Click OK to save your changes, if need be.
Leave this window open for the next step.
Enabling remote connections
By default, SQL Servers do not allow connections from remote computers. If you are using a two machine configuration you will definitely need to change this setting to allow remote connections so that AssetTrack Server can access the SQL Server from the IIS machine. If you are running both SQL Server and IIS on a single machine, this is optional but recommended for ease of remote administration.
- If you are not already on the Server Properties window, follow the steps above to open it.
- On the Server Properties window, click Connections.
- Make sure the Allow remote connections to this server is selected.
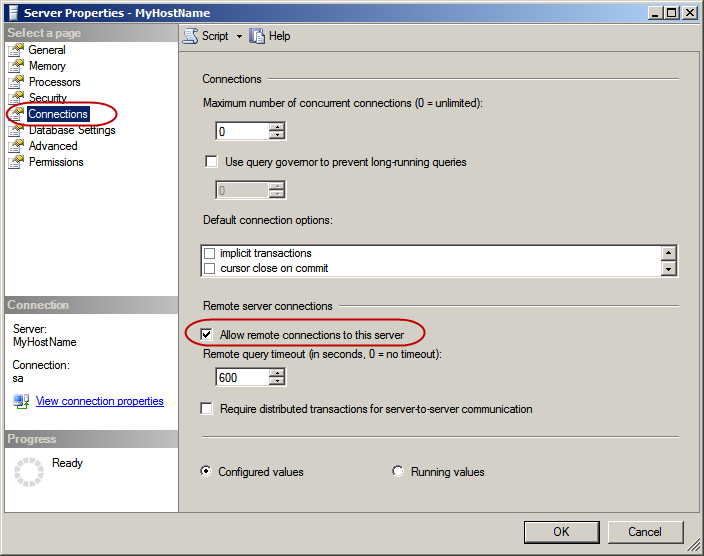
- Click OK to save your changes.