Installing the CA Integration Components
- What you will need before you begin (S)
- Server names for all relevant IIS servers and SQL Servers
- Administrator access to install software on AssetTrack Server.
- Administrator access to the MDB (for creating views)
- Administrator access to APM application
- APM installation media (for 11.3.x components)
- Network configuration authorization (for ensuring connectivity between AssetTrack, APM/MDB)
Installing the CA Unicenter Integration Components
The Unicenter Integration Components enable integration between AssetTrack and CA Asset Portfolio Management/ITAM or Service Desk r11. In most cases, you will install all components on your AssetTrack Server (single server environment). You may opt to install the UAPM integration web service on a different server if necessary (dual server environment).
Prerequisites
.NET Framework 3.5
Regardless of if your environment is a single server or a dual server environment, the Microsoft .NET Framework 3.5 SP1 must be installed on all servers in order for the integration to function. You can verify that .NET 3.5 SP1 is installed by checking for the existence of the following directory:
C:\WINDOWS\Microsoft.NET\Framework\v3.5.xxxx
If this directory does not exist, download and install the .NET Framework 2.0 SP1.
Know your CA IT Asset Manager or UAPM version
Out of the box, the Unicenter Integration Components assume that you will be integrating with UAPM r11.3.4 or greater orCA ITM 12.6 or greater. If you have an earlier version of UAPM (most commonly we see 11.3.0), you will need to downgrade the Unicenter Integration Components after you've installed them.
Running the installer
The installer for the UAPM integration is a standard Microsoft Installer MSI file named AT_UnicenterIntegration_3.X.XXX.msithat should have been provided by an AMI sales or support representative.
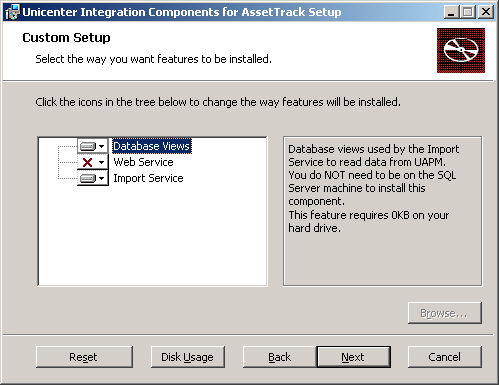
Choose installation options.
 If your MDB is an Oracle database
If your MDB is an Oracle database, you will not install the Database Views feature using the installer. Change the installation setting for Database Views so that it has the red X next to it, then go through the rest of the installation steps on this page. After the installer has completed, see the Oracle section at the bottom of the page for further instructions on how to install Database Views for Oracle.
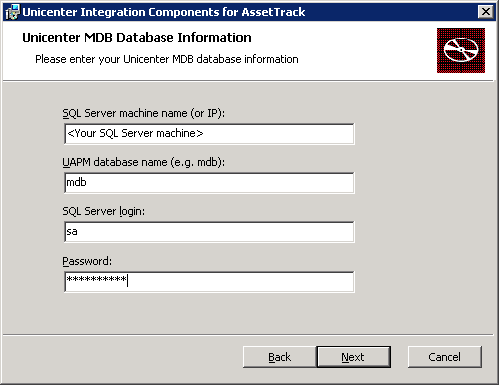
- If you chose to install the "Database Views" you will be presented with the dialog below to specify credentials to your MDB database information. You will not see this page if you chose not to install "Database Views".
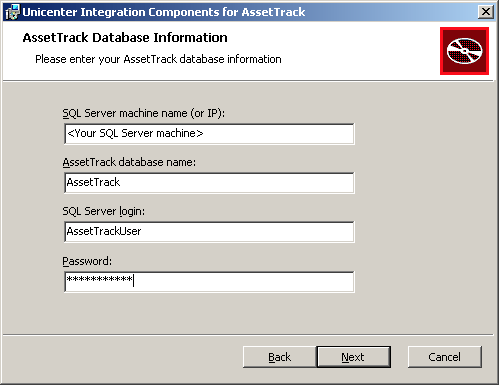
After clicking "Next" you will be presented with another interview screen. Enter your AssetTrack database information.
- Complete the installer steps. In the subsequent steps, you will configure the components that you just installed.
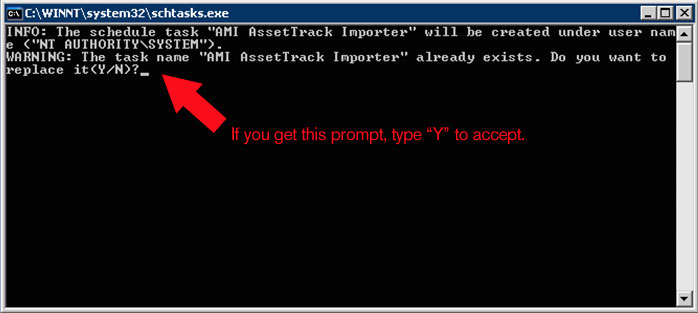
If you're prompted by the following message (it typically just flashes up momentarily and goes away without user interaction), press "Y" to approve the replace.
 Failed to read IISWebs table error Failed to read IISWebs table error |
|---|
If you get the following error message during installation of the Import Service, look up the error message in the Troubleshooting AssetTrack Server Installation page to resolve it. 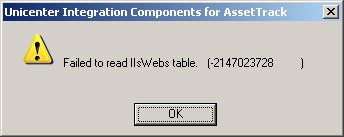 |
 Note Note |
|---|
| If you are using a version of UAPM earlier that 11.3.4, you will need to manually downgrade your integration components so that the integration components match your UAPM version. See this troubleshooting section for instructions. |
If your MDB is an Oracle database
Installing the Database Views on Oracle is a simple matter of running an SQL script against your MDB. The script creates views and it does not alter any data.
Before you start, you will need to ensure the following:
- You have the SQL file downloaded from AMI. It should be part of the your installer set provided to you by your account manager. If it's not, contact support@amitracks.com.
- If you're not running the script from the Oracle server itself, you will need Oracle client tools installed, specifically SQL Plus.
- You will need the password for the Oracle database user, 'mdbadmin'.
Use the following syntax to run the script:
sqlplus mdbadmin/<password> @<path to sql file>
For example, if the mdbadmin password is 'tiger' and your script is located at the root of your C:\ drive, the command would be:
sqlplus mdbadmin/tiger @C:\AssetTrack_Uapm_Views_Oracle.sql