Installing and configuring IIS and the .NET Framework
This section covers how to install various Windows components, notably the .NET Framework and other server roles on your Windows Server.
AssetTrack requires .NET Framework 3.5 Service Pack 1 and IIS version 7.x. To install earlier versions, please see Configuring IIS.
On this page:
Before you begin
Ensure that you have administrative user rights on the server on which you plan to install IIS 7.x. By default, you do not have administrative user rights if you are logged on as a user other than as the built-in administrator, even if you were added to the local Administrators group on the computer (this is a new security feature in Windows Server 2008 called Local User Administrator).
Log on either to the built-in administrator account, or explicitly invoke applications as the built-in administrator by using the runas command-line tool:
runas /user:administrator
If you are logged on to an account other than the built-in local administrator account, you may see a security alert "Windows needs your permission to use this program". Click Allow to continue.
Installing .NET Framework on the Windows Server 2008
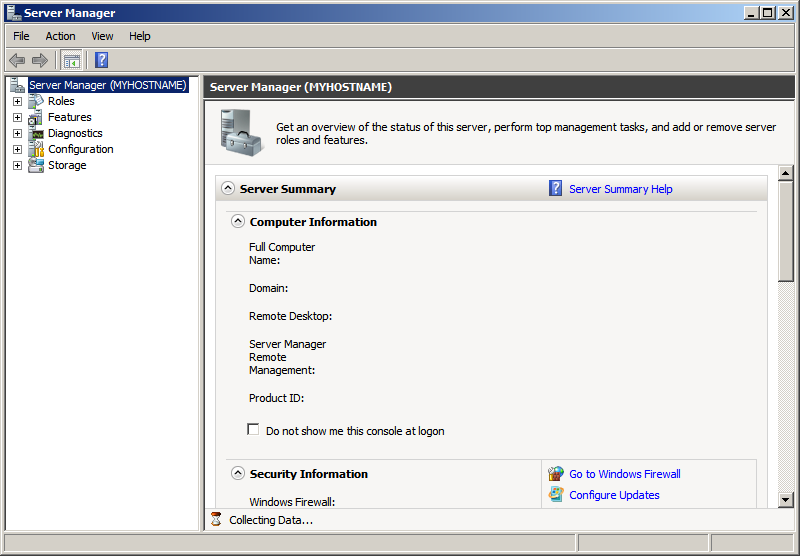
Microsoft .NET Framework can be installed by using the Server Manager interface.
- Click Start -> All Programs -> Administrative Tools -> Server Manager. The Server Manager window is displayed.
- In the Server Manager window, scroll down to Features Summary.
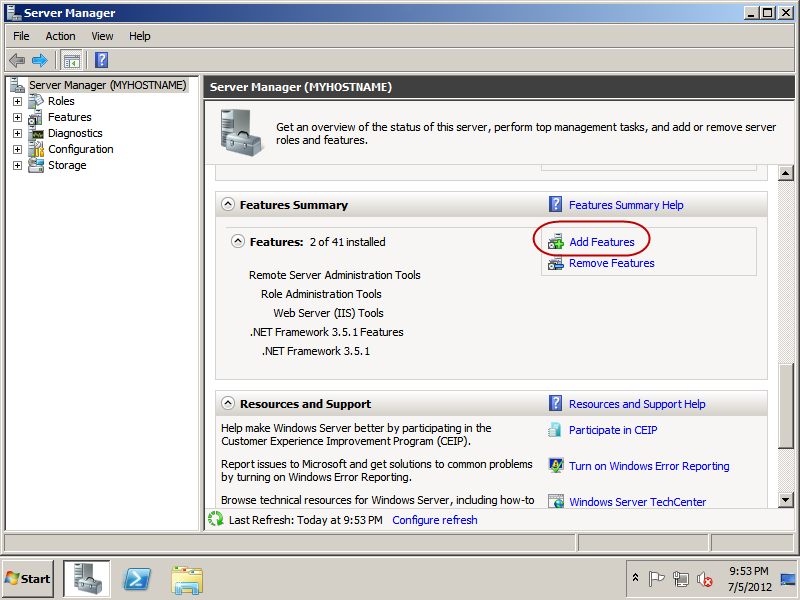
Windows 2008 will have .NET Framework 3.5.1 on your server.
- Click Add Features.
- Expand .NET Framework 3.5.1 Features (Installed) and under that, expand WCF Activation.
- Select the following:
.NET Framework 3.5.1 Features (Installed)
WCF Activation (Click Add Required Features when the Add features required for WCF Activation? page is displayed.)
HTTP Activation
Non-HTTP Activation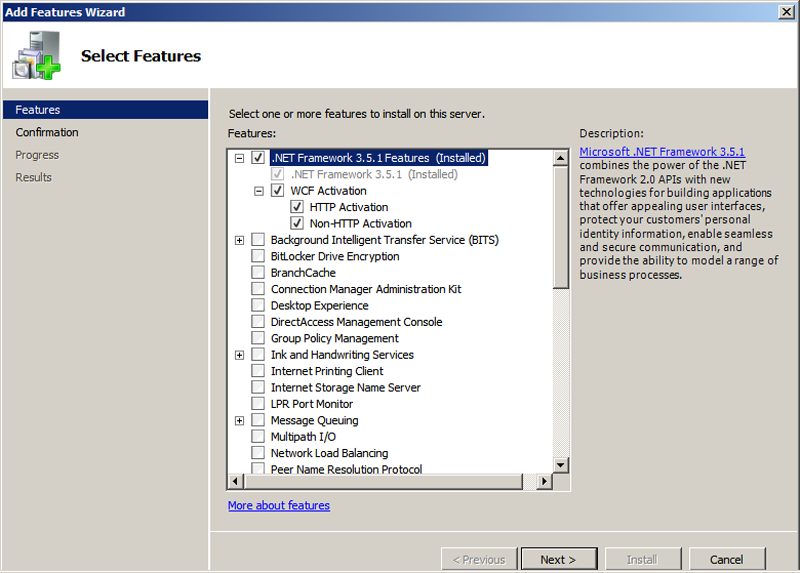
- Click Next. The Confirm Installation Selections page is displayed.
- Click Install and the install of the .NET Framework features will begin.
When complete the Installation Results page is displayed.
- Review what was installed and if it was successful, click Close.
You'll now see the new .NET Framework features listed on the Server Manager under Features Summary - Leave the Server Manager up for the next step.
Installing IIS 7 on Windows Server
IIS 7 is installed by using the same Server Manager interface.
- If not already open from the previous step, click Start -> All Programs -> Administrative Tools -> Server Manager.
The Server Manager window is displayed.
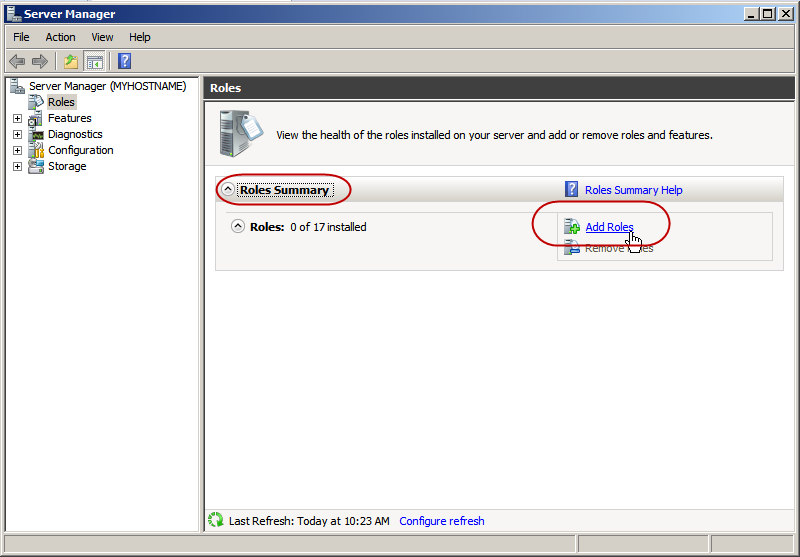
- In the Server Manager window, scroll down to Roles Summary.
- If Web Server (IIS) is not one of the roles listed then click Add Roles.
- The Add Roles Wizard will start with a Before You Begin page. The wizard asks for verification of the following:
a. The administrator account has a strong password.
b. The network settings, such as IP addresses, are configured.
c. The latest security updates from Windows Update are installed.
- Click Next.
The Select Server Roles screen is displayed. - Select Web Server (IIS) and click Next.
An introductory page will open with links for further information.
Click Next.
The Select Role Services screen is displayed.
When you use the Add Roles Wizard to install IIS, you get the default installation, which has a minimum set of role services.
Select the following IIS services to be installed. Add only the modules needed to minimize the IIS installation footprint and keep your server as secure as possible.Setting Comments ASP.NET Under Application Development. Click Add Required Role Services when the Add role services required for ASP.NET? screen appears. Basic Authentication Under Security Windows Authentication If using Windows Authentication: , under Security IIS 6 Metabase Compatibility Under IIS 6 Management Compatibility, under Management Tools 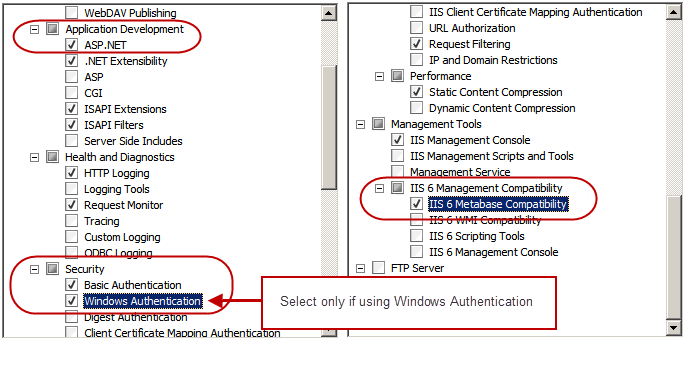
- Once desired modules are added, click Next.
The Confirm Installation Selections window is displayed. - Review your selections and click Install.
The Installation Progress screen is displayed. - The wizard lists Web Server (IIS) under The following roles, role services, or features are being stalled window, and displays a progress bar.
When done installing an Installation Results page is displayed and, if successful, an Installation succeeded message is displayed. - Click Close to finish the install.
- Confirm that the Web server works by using http://localhost.
If successful, an IIS7 Welcome screen will be displayed in your browse