AssetTrack for iOS
Can my iOS device run AssetTrack?
AssetTrack for iOS works on iOS 6 or greater. iPhone 5, or 5th generation iPod, iPad or iPad mini are all supported.
AssetTrack for iOS
AssetTrack iOS is the iPhone/iPad app for AssetTrack. It is used by mobile AssetTrack users needing to capture and update asset information using their iOS devices.
AssetTrack Server
AssetTrack iOS connects to an AssetTrack Server that is managed by your asset manager. Your AssetTrack device is configured to connect to an AssetTrack Server via the sign-on screen. Your asset manager should have provided you with a URL to enter when signing in. If you do not have a URL to enter into your AssetTrack iOS sign-on screen, contact your asset manager.
Signing In
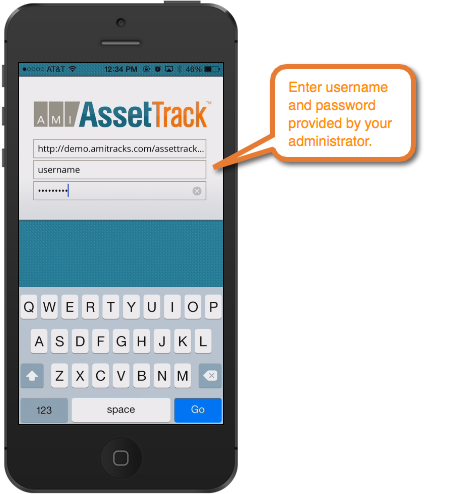
When you first launch the AssetTrack iOS app, the sign-in screen appears and displays three fields:
- Server address: This is the URL of the AssetTrack API server that your app will be talking to. This URL should've been provided to you by your AssetTrack administrator.
- User name: If you're using AssetTrack security, this is your AssetTrack username. If you're using Windows Security, then it will be your Windows user name.
- Password: Case-sensitive.
Complete the form and tap Go to sign in.
If you've correctly specified these three items above, you will be taken to the main screen. Once you have signed into AssetTrack, you should remain signed in until you explicitly sign out.
The Form List
Using AssetTrack iOS is all about using forms to capture asset information. Each form is designed for a specific task such as Receiving, MAC or Retirement. Ask your asset manager for instruction on which form to use for each task.
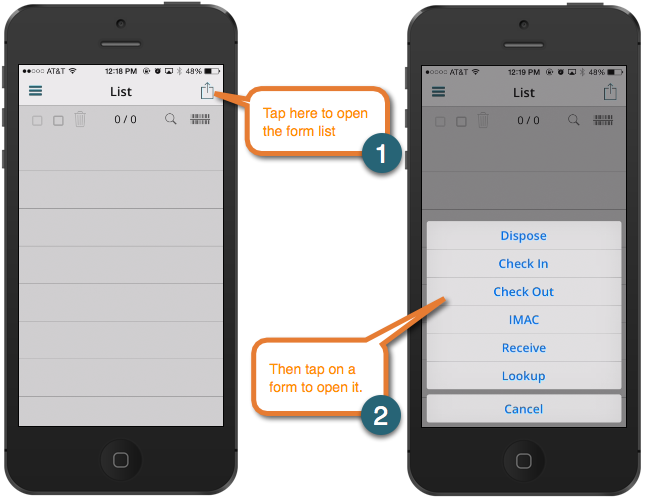
When you first sign into AssetTrack iOS, you will see an empty asset list. Use the form icon to open the form list, then tap to choose a form. Note that your forms are created by your asset manager and may differ from the forms shown below.
Single vs. Bulk Forms
There are two types of AssetTrack forms: Single and Bulk:
- Single forms let you view and update a single asset at a time.
- Bulk forms let you update many assets at once.
Single Form Example
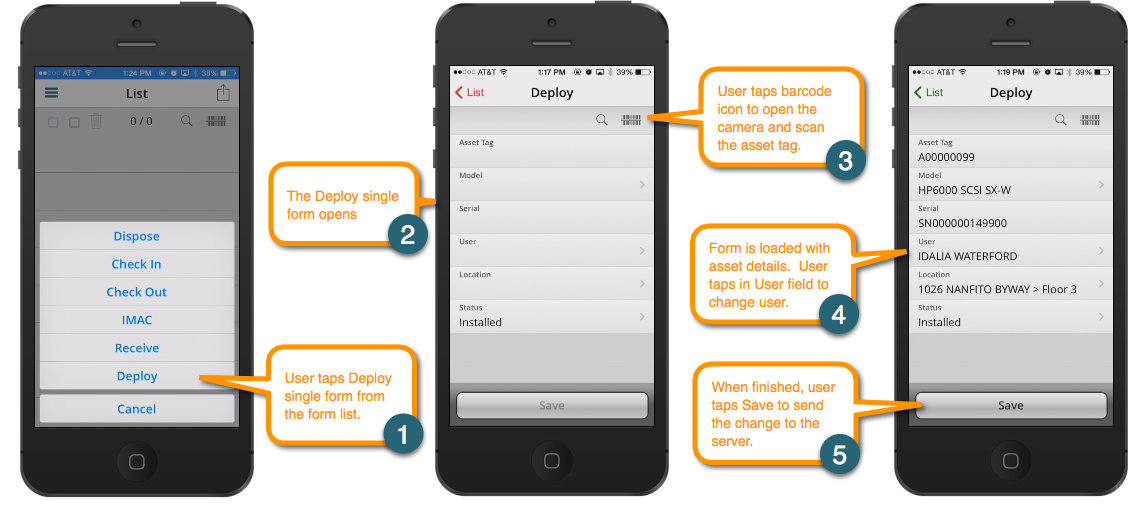
Single forms are best for tasks where you need to scan an asset tag, view information about an asset, then update a few fields for that asset. For example, when Deploying a single asset to a user, the user below opens a "Deploy" single form, scans the asset tag, updates the user and location, and sends the record update to the server.
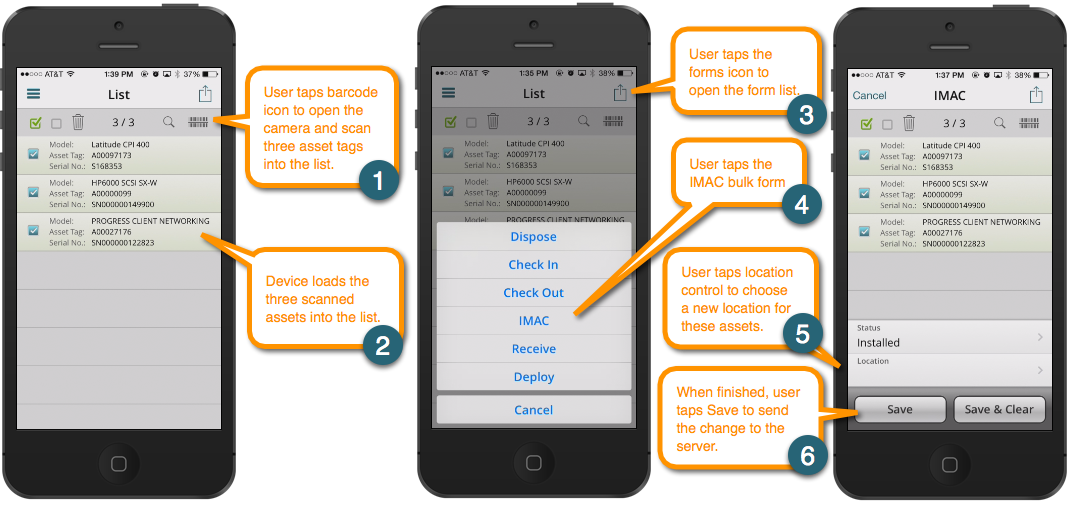
Bulk Form Example
Bulk forms are best for updating a bunch of assets at once, such as moving multiple assets to a new location. When you enter data into a bulk form, every asset that is checked in your asset list will be updated with the values you enter.
For example, the user below scans three asset tags into the asset list, then chooses a IMAC bulk form to move them all to a new location. When the user chooses a location from the list and taps Save, all three assets are moved to that location.
Keep in mind that your IMAC form may have other fields such as User, Status or an Inventory Date. Just remember that every asset gets updated with the values you enter in a bulk form. Therefore, you should never set up a bulk form with fields that are unique to an asset, such as asset tag, serial number or MAC address. Those values are never shared by multiple assets.
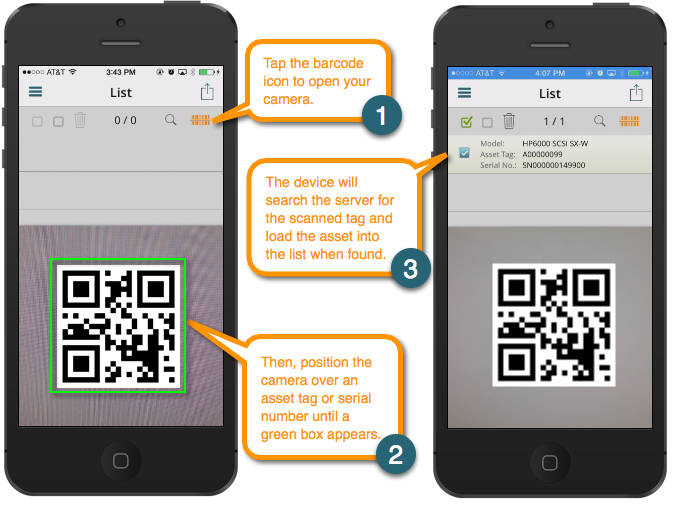
Scanning Assets into the Asset List
To use a bulk form, you need to have at least one asset in your asset list. You can add an asset to your asset list by scanning an asset tag or serial number barcode. Both 1D and QR barcodes are supported. Use the barcode icon to open your camera, then position the camera over your barcode steadily until a green box appears.
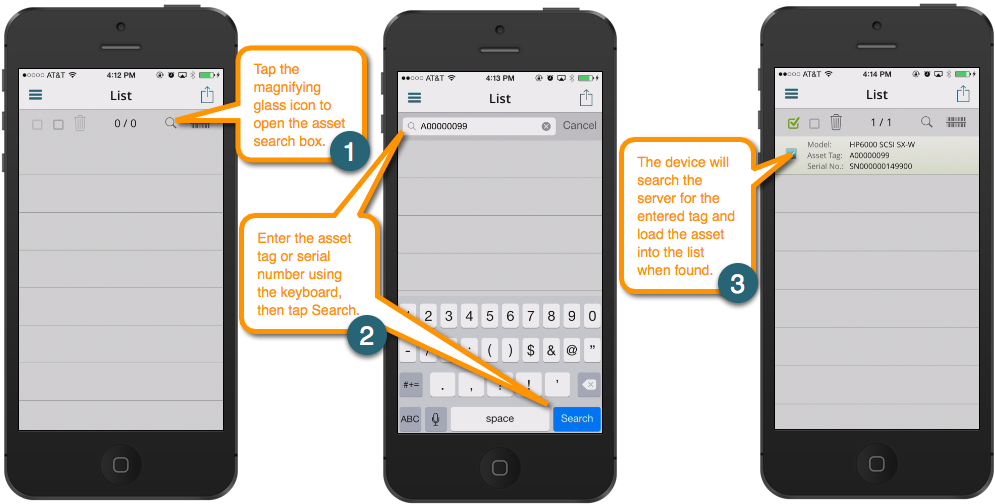
Adding an Asset Manually
You can also manually search for an asset by asset tag or serial number when a barcode is not available, or not easily read by your device camera. Use the magnifying glass icon to open a search control where you can manually key in an asset tag or serial number.
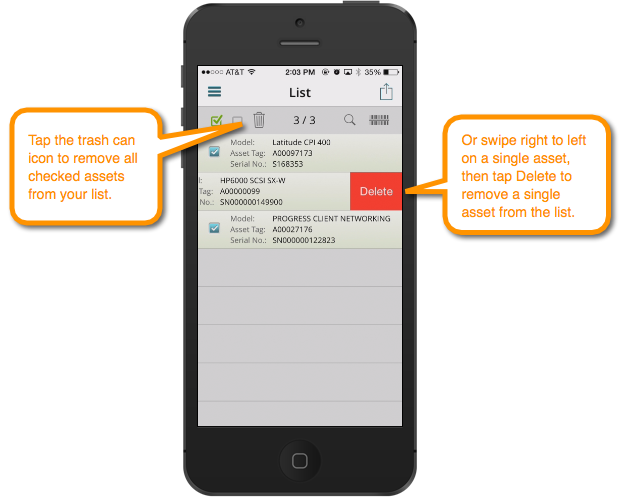
Removing Assets from the Asset List
To remove assets from your asset list, check the box next to the asset, then tap the trash can icon. Also, you can swipe right-to-left on an asset in the list and select Delete to remove a single asset.
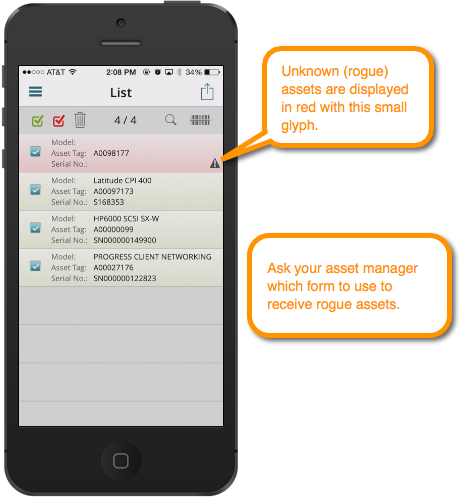
Rogue (Unknown) Assets
A rogue asset is any asset you scan that is not found in the database. When you scan an asset tag that is not found in the database, the asset is loaded into the and it is shown in Red, with a small glyph in the lower right corner indicating that it is an unknown asset record. When you encounter a Rogue asset, ask your asset manager which form you should use to enter the asset into the database.
Save vs. Save & Clear
When you have completed a form, tap Save to send the updates to the server and to leave the assets in the asset list. Tap Save & Clear to upload your changes and clear the selected assets from the asset list.
Remember that only the assets that are checked in the list are sent up to the server when you tap Save.
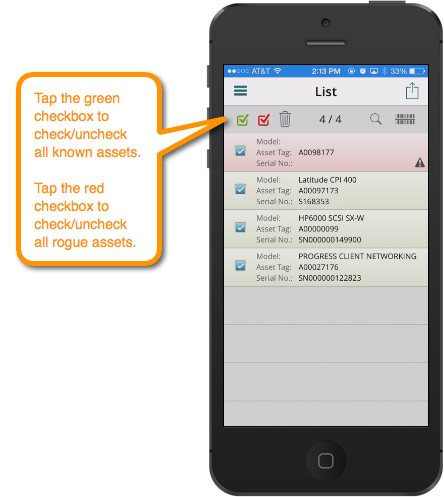
Selecting Assets in the Asset List
You can individually check an asset in the asset list by tapping on the checkbox. You can check all known assets by tapping the green checkbox next to the trash can. You can check/uncheck all rogue assets by tapping the red checkbox.
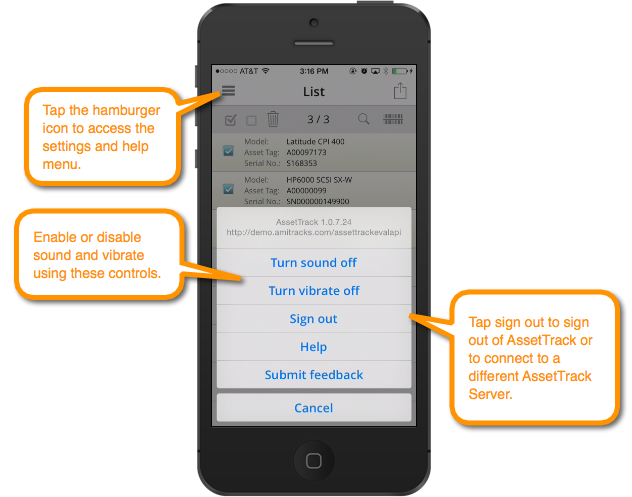
Signing Out
To log out of AssetTrack iOS or connect to another AssetTrack Server, open the settings panel and tap Sign Out. You can access other settings in this panel include Sound and Vibrate settings as well.